

Environment Variables on Astronomer can be used to set both Airflow configurations (reference here) or custom values, which are then applied to your Airflow Deployment either locally or on Astronomer.
Environment variables can be used to set any of the following (and much more):
This guide will cover the following:
On Astronomer, there are 3 ways to set environment variables:
.env file (Local Only)DockerfileRead below for instructions on how to configure them via all 3 methods.
While environment variables on Astronomer are the equivalent of updating your airflow.cfg, you are NOT able to bring your own airflow.cfg file on Astronomer and configure it directly.
.env (Local Only)You can use the Astro CLI to import environment variables from the .env file that was automatically generated when you initialized an Astro project on Astronomer using$ astro dev init.
To add environment variables locally,
.env file in your Astro project directory.env file$ astro dev start --env .envIn your .env file, insert the value and key, ensuring all-caps for all characters. For example:
If your environment variables contain secrets you don’t want to expose in plain-text, you may want to add your .env file to .gitignore if and when you deploy these changes to your version control tool.
By default, Airflow environment variables are hidden in the Airflow UI for local environments. To confirm your environment variables in the Airflow UI for a local environment, set AIRFLOW__WEBSERVER__EXPOSE_CONFIG=True in either your Dockerfile or .env file (local only).
Alternatively, you can run:
This will output 3 Docker containers that were provisioned to run Airflow’s 3 primary components on your machine: The Airflow scheduler, webserver and Postgres metadata database.
Now, create a Bash session in your scheduler container by running:
If you run ls -1 following this command, you’ll see a list of running files:
Now, run:
This should output all environment variables that are running locally, some of which are set by you and some of which are set by Astronomer by default.
You can also run cat airflow.cfg to output all contents in that file.
The CLI will look for .env by default, but if you want to specify multiple files, make .env a top-level directory and create sub-files within that folder.
In other words, your project might look like the following:
DockerfileIf you’re working on an Astro project locally but intend to deploy to Astronomer and want to commit your environment variables to your source control tool, you can set them in your Dockerfile. This file was automatically created when you first initialized your Astro project on Astronomer (via $ astro dev init).
Given that this file will be committed upstream, we strongly recommend withholding environment variables containing sensitive credentials from your Dockerfile and instead inserting them via your .env file locally (while adding the file to your .gitignore) or setting them as ‘secret’ via the Software UI, as described in a dedicated section below.
To add environment variables, insert the value and key in your Dockerfile beginning with ENV, ensuring all-caps for all characters. With your Airflow image commonly referenced as a “FROM” statement at the top, your Dockerfile might look like this:
Once your environment variables are added,
$ astro dev stop and $ astro dev start to rebuild your image and apply your changes locally OR$ astro deploy to apply your changes to your running Airflow Deployment on AstronomerEnvironment variables injected via the Dockerfile are mounted at build time and can be referenced in any other processes run during the docker build process that immediately follows $ astro deploy or $ astro dev start. Environment variables applied via the Software UI only become available once the docker build process has been completed.
The last way to add environment variables on Astronomer is to add them via the Software UI. For environment variables that you only need on Astronomer and not locally, we’d recommend using this method.
To set them,
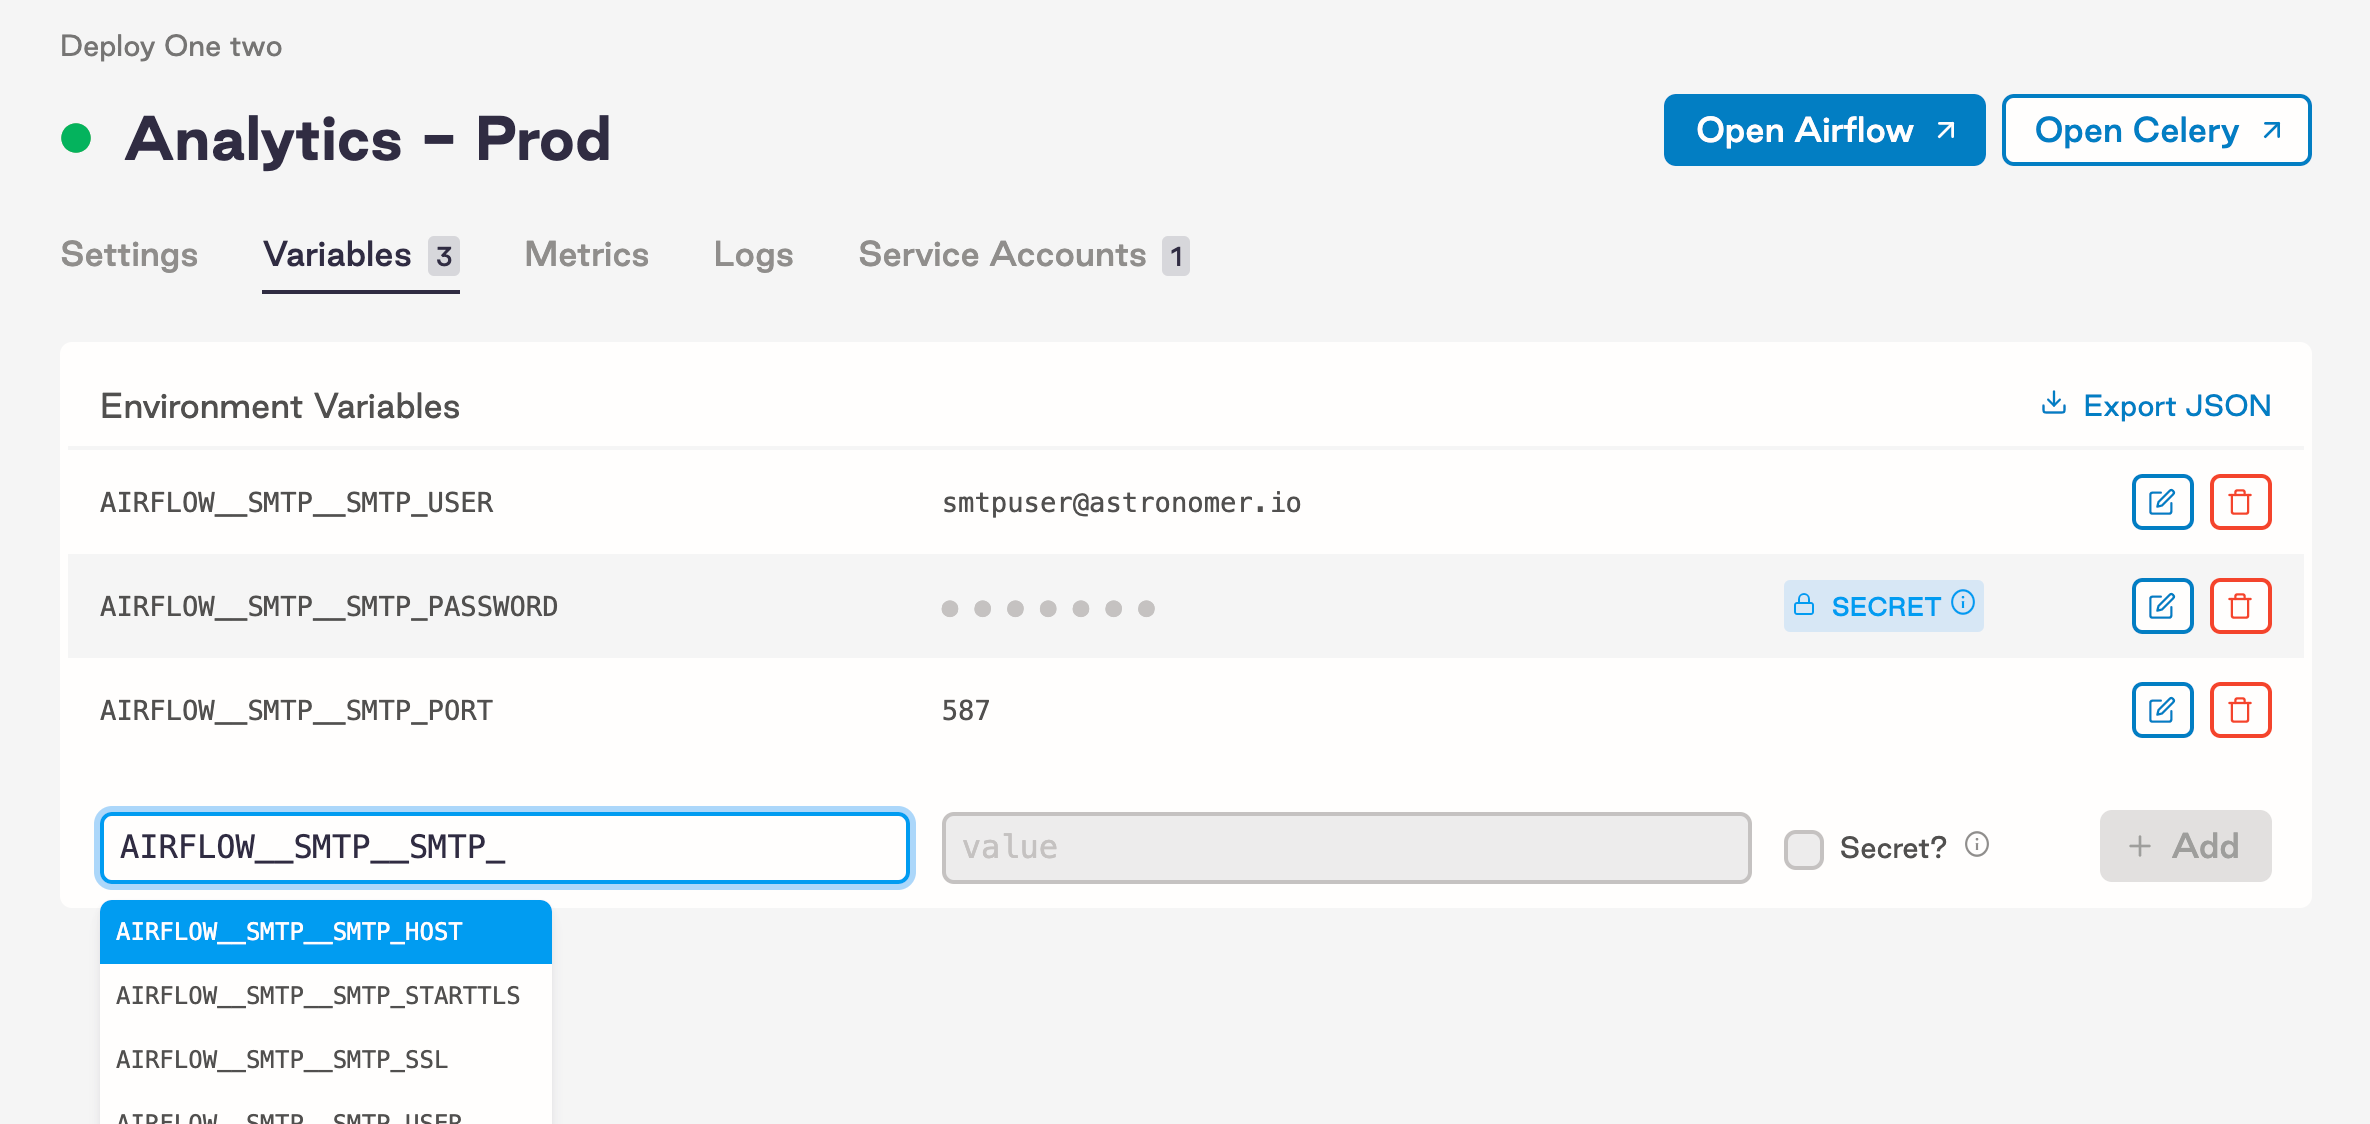
Input for all configurations officially supported by Airflow are pre-templated, but you’re free to specify your own values.
On Astronomer, users have the ability to mark any Environment Variable as “secret” via the UI. For those who have environment variables containing potentially sensitive information (e.g. SMTP password, S3 bucket, etc.), we’d recommend leveraging this feature.
To do so from the “Variables” tab,
Once changes are deployed, environment variables marked as “secret” will NOT be available in plain-text to any user in the Workspace.
A few additional notes:
Read below for more detail on how environment variables are encrypted on Astronomer.
As noted above, Workspace roles and permissions apply to actions in the “Variables” tab. For a full breakdown of permissions for each role, reference Astronomer’s “Roles and Permissions” doc.
Given the ability to set environment variables across 3 different methods potentially simultaneously, it’s worth noting the precedence each take.
On Astronomer, environment variables will be applied and overridden in the following order:
airflow.cfg)In other words, if you set AIRFLOW__CORE__PARALLELISM with one value via the Software UI and you set the same Environment Variable with another value in your Dockerfile, the value set in the Software UI will take precedence.
All values for environment variables that are added via the Software UI are stored as a Kubernetes Secret, which is encrypted at rest and mounted to your Deployment’s Airflow pods (scheduler, webserver, worker(s)) as soon as they’re set or changed.
Environment variables are not stored in Airflow’s metadata Database and are not stored in Astronomer’s platform database. Unlike other components, the Astronomer Houston API fetches them from the Kubernetes Secret instead of the platform’s database to render them in the Software UI.
For users who regularly leverage Airflow connections and variables, we’d recommend storing and fetching them using environment variables.
As mentioned above, Airflow connections and variables are stored in Airflow’s metadata database. Adding them outside of task definitions and operators requires an additional connection to Airflow’s Postgres database, which is called every time the scheduler parses a DAG (as defined by processor_poll_interval, which is set to 1 second by default). By adding connections and variables as environment variables, you can refer to them more easily in your code and lower the amount of open connections, thus preventing a strain on your database and resources.
Read below for instructions on both.
The Environment Variable naming convention for Airflow connections is:
For example, consider the following Airflow connection:
MY_PROD_DBmy-conn-type://login:password@host:5432/schemaHere, the full environment variable would read:
You’re free to set this environment variable via an .env file locally, via your Dockerfile or via the Software UI as explained above. For more information on how to generate your Connection URI, refer to Airflow’s documentation.
The environment variable naming convention for Airflow variables is:
For example, consider the following Airflow variable:
My_Var2Here, the environment variable would read:
The ability to store and fetch Airflow variables was introduced in Airflow 1.10.10 and is not available in earlier versions.