

Astro Private Cloud supports a permissions and role-based access control (RBAC) framework that allows users to configure varying levels of access both at the Workspace and Airflow Deployment levels.
Workspace and Deployment-level access can each be configured with three user roles (Admin, Editor, Viewer), all of which can be set and changed via the Astro Private Cloud UI and CLI. Each role maps to a combination of permissions for both Astro Private Cloud and Apache Airflow itself.
This guide includes:
Workspace and Deployment Admins can invite and otherwise manage users both via the Astro Private Cloud UI and CLI. All users who have access to a Workspace must be assigned one of three Workspace roles, though Deployment-level roles are not required.
Read below for guidelines.
The ability to invite users to an Astronomer Workspace is limited to Workspace Admins, who can also grant the Admin role to other users. Workspace Editors and Viewers cannot invite or otherwise manage other Workspace users, though they may do so at the Deployment level depending on their Deployment-level role.
A user who creates a Workspace is automatically granted the Admin role for the Workspace and has the ability to create any number of Airflow Deployments within it. Every Workspace must have at least one Workspace Admin.
To invite a user to a Workspace via the Astro Private Cloud UI, select your Workspace from the Workspace list dropdown on the side navigation bar and navigate to Workspace Settings > Users > Invite User.
When a Workspace Admin invites a user to a Workspace in which one or more Airflow Deployments exist, they’ll have the opportunity to set that user’s Deployment-level roles as well, though it is not required.
If a Workspace Admin invites a user to a Workspace that has no Airflow Deployments, the Deployment Roles modal will not appear.
To invite a user to a Workspace using the Astro CLI, run:
Only Workspace Admins can invite other users and set their permissions.
To find Workspace ID, you can:
$ astro workspace list/w/ (e.g. https://app.basedomain/w/<workspace-id>)To set a Role, add a flag in the following format:
--WORKSPACE_EDITOR--WORKSPACE_VIEWER--WORKSPACE_ADMINIf you do not specify a role in this command, WORKSPACE_VIEWER will be set by default. In all cases where a user is invited to a Workspace and Deployment-level role is not specified, no Deployment-level role will be assumed.
You can invite a group of users from a configured third party identity provider (IdP) as a Team to your Workspace. A Team is an IdP-defined group of users who all share the same permissions to a given Deployment or Workspace.
Note that to use Teams, a System Admin must first complete the setup in Integrate an auth system and configure user groups as described in Import IdP Groups.
To add a Team to a Workspace:
In the Control Plane UI, go to your Workspace Settings page and open the Teams tab.
Click +Team.
Under Team Name, enter the name of your IdP group.
Select a Workspace Role for the Team. If your Workspace has existing Deployments, you can also configure the Team’s permissions to those Deployments on this page:
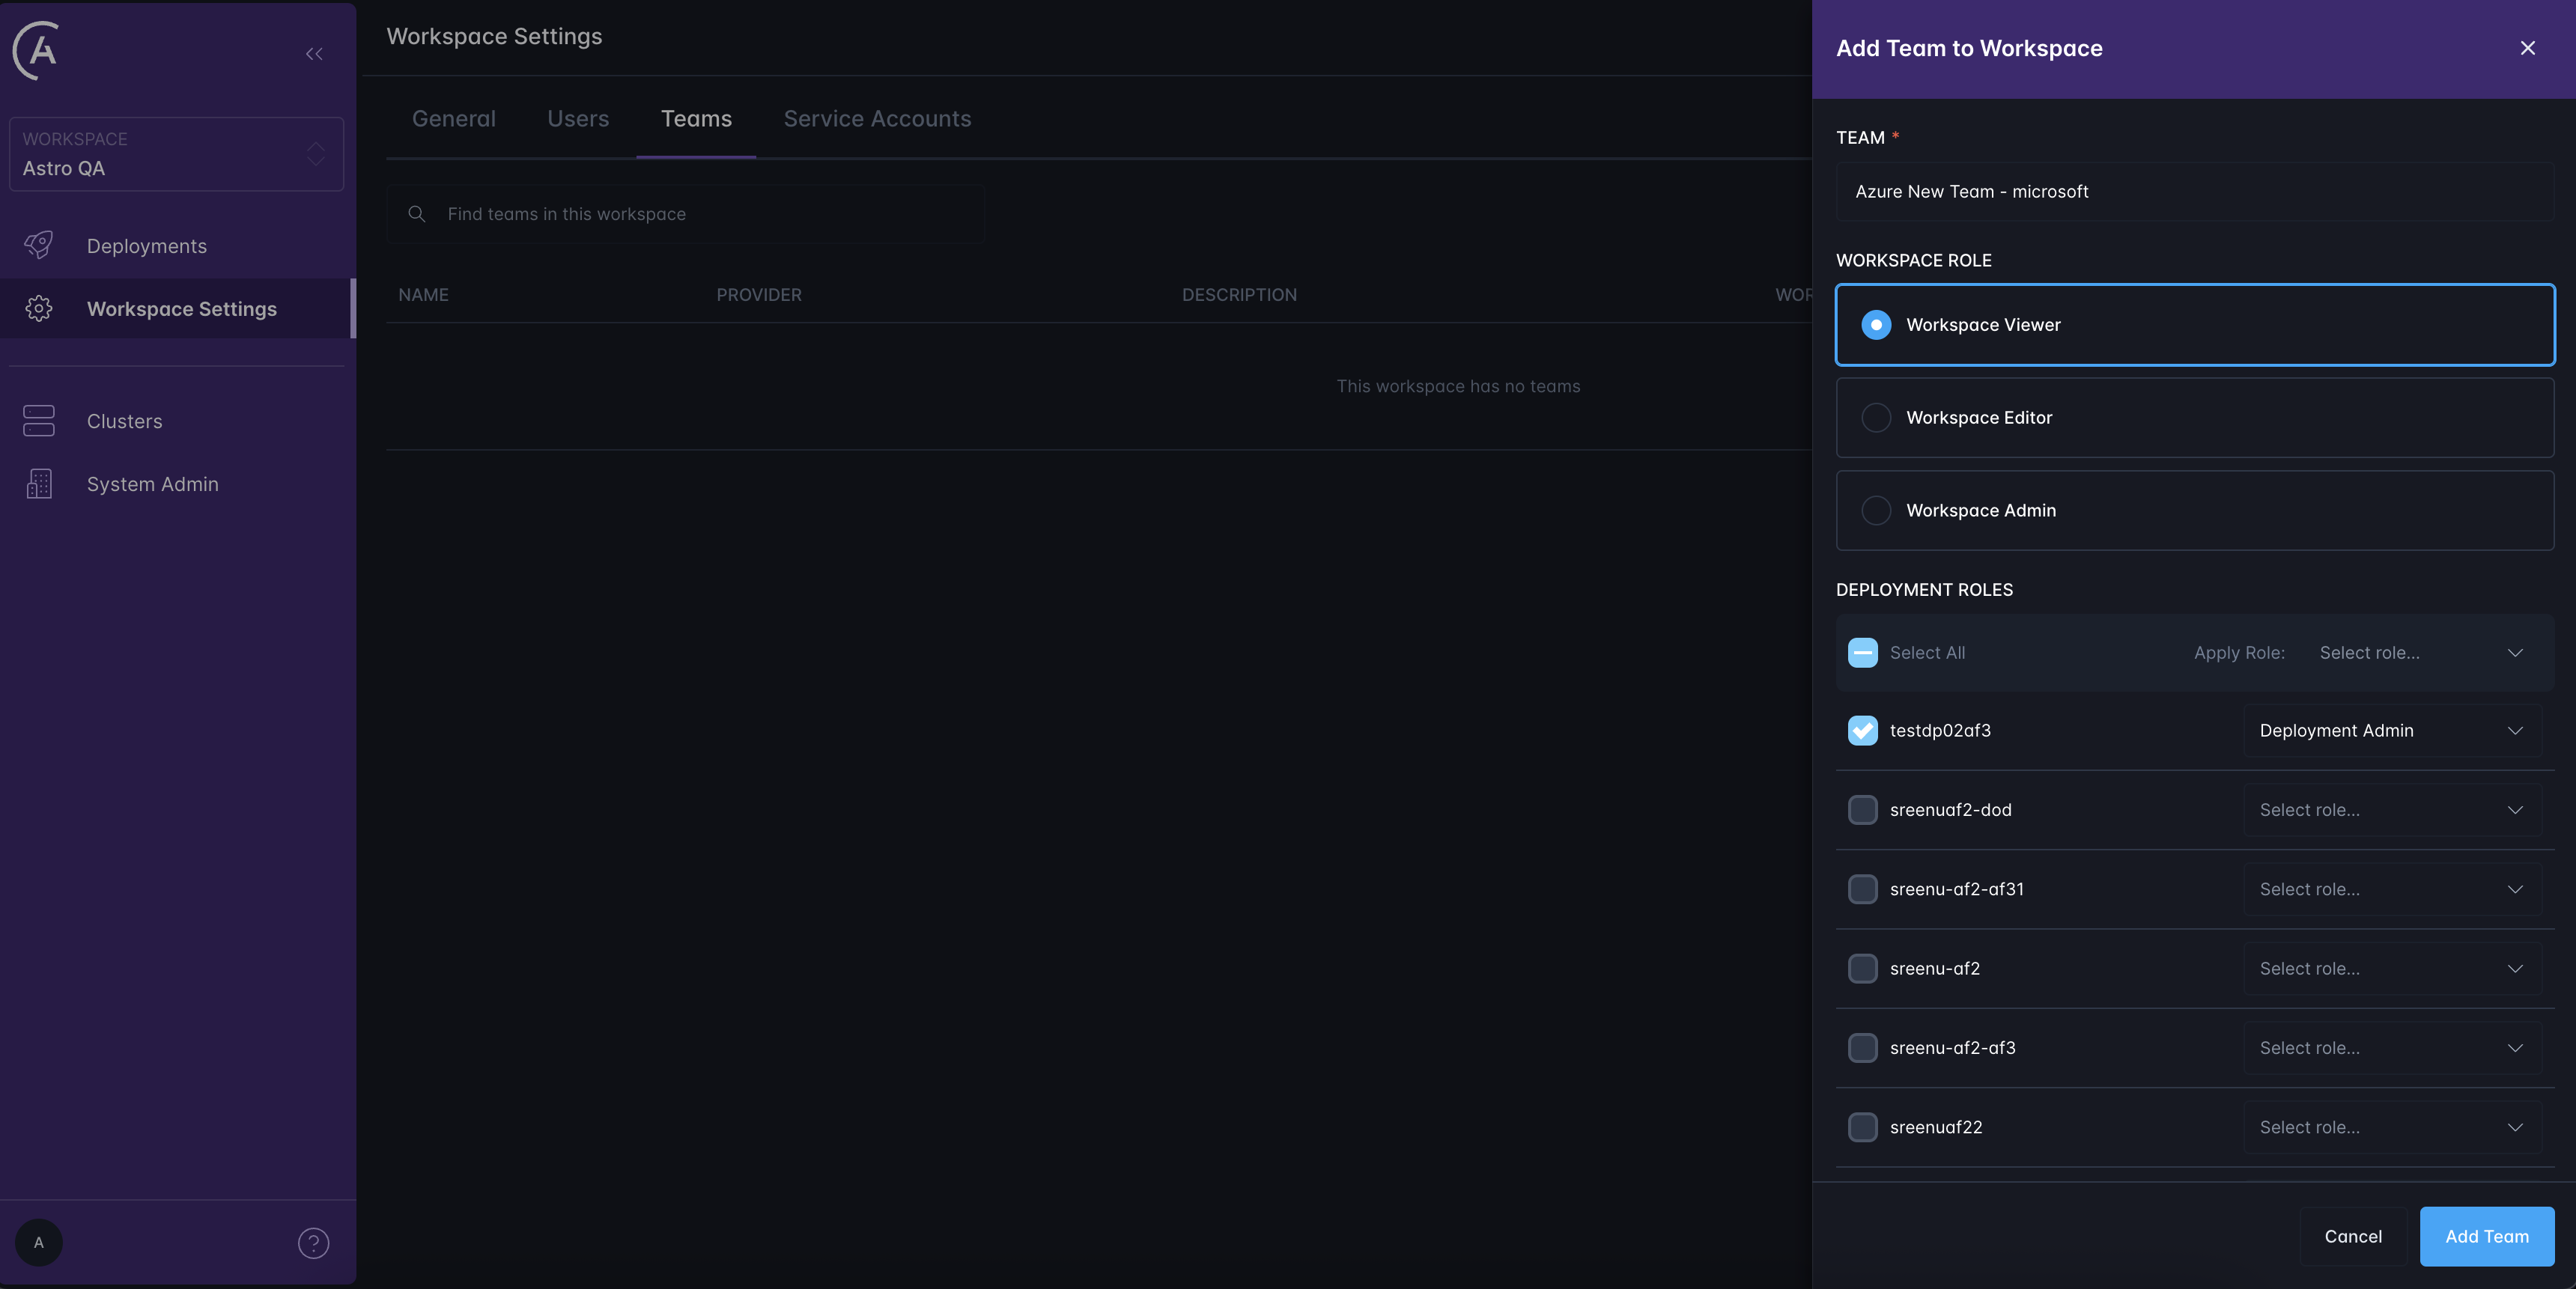
Click Add.
The ability to invite Workspace users to an Airflow Deployment within it is limited to Deployment Admins, who can also grant the Admin role to other users. Deployment Editors and Viewers cannot invite or otherwise manage users. A user who creates a Deployment is automatically granted the Admin role within it.
In order for a user to be granted access to an Airflow Deployment, they must first be invited to and assigned a role within the Workspace. A user can be a part of a Workspace but have no access or role to any Airflow Deployments within it.
To invite a Workspace user to an Airflow Deployment via the Astro Private Cloud UI:
+ symbol.To invite a Workspace user to an Airflow Deployment using the Astro CLI, run:
Only Deployment Admins can invite other users and set their permissions.
To find Deployment ID, you can:
$ astro deployment listTo set a Role, add a flag in the following format:
--DEPLOYMENT_EDITOR--DEPLOYMENT_VIEWER--DEPLOYMENT_ADMINIf you do not specify a role in this command, DEPLOYMENT_VIEWER will be set by default.
You can invite a group of users from a configured third party identity provider (IdP) as a Team on your Deployment. A Team is an IdP-defined group of users who all share the same permissions to a given Deployment or Workspace.
Note that to use Teams, a System Admin must first complete the setup in Integrate an auth system and configure user groups as described in Import IdP Groups.
To add a team to a Deployment:
In the Control Plane UI, go to your Deployment and open the Teams tab.
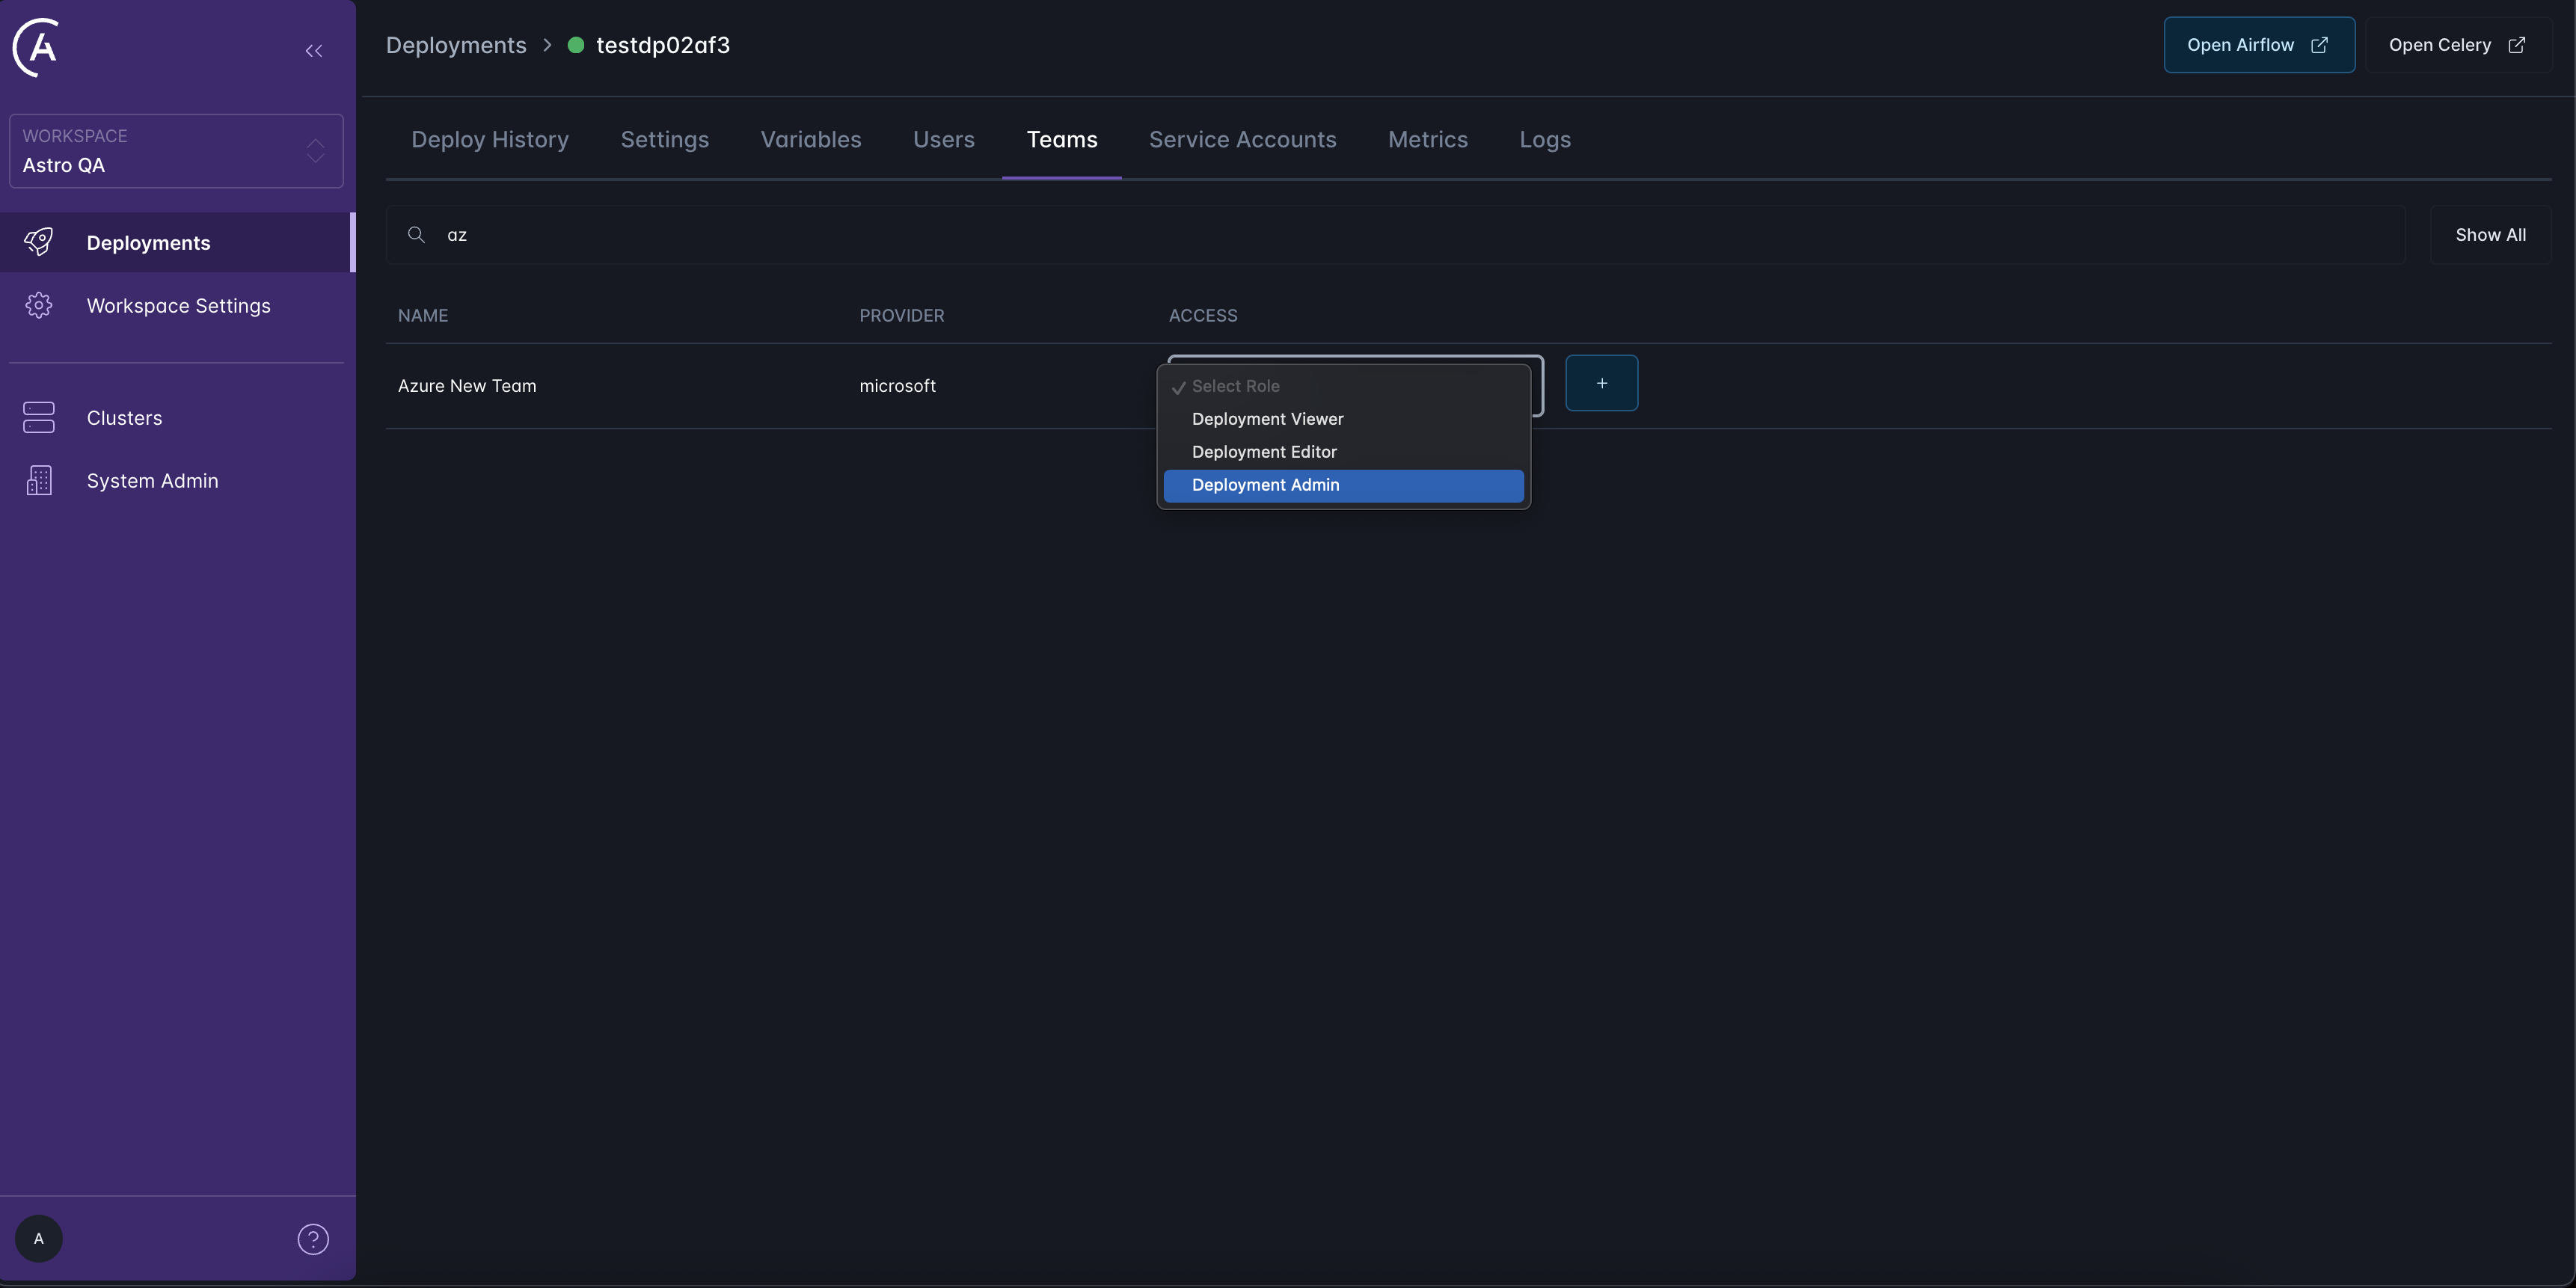
In the search bar that appears, search for your Team’s name.
When your Team appears, select a Deployment-level role for the Team and click the + button:
To view roles within a Workspace via the Astro Private Cloud UI, select your Workspace from the left sidebar and navigate to Workspace Settings > Users. All Workspace users have access to this view and can see the roles of other users.
To list Workspace users using the Astro CLI, run:
This command will output the email addresses of all users in the Workspace alongside their ID and Workspace Role.
If you’re a Workspace Admin, you can edit both Workspace and Deployment-level permissions by selecting your Workspace from the left sidebar and navigating to Workspace Settings > Users and clicking into an individual user.
To edit a user’s role using the Astro CLI, run:
Only Workspace Admins can modify the role of another user in the Workspace.
Workspace Admins can remove users from a Workspace by selecting your Workspace from the left sidebar and navigating to: Workspace Settings > Users > Individual User > Remove User.
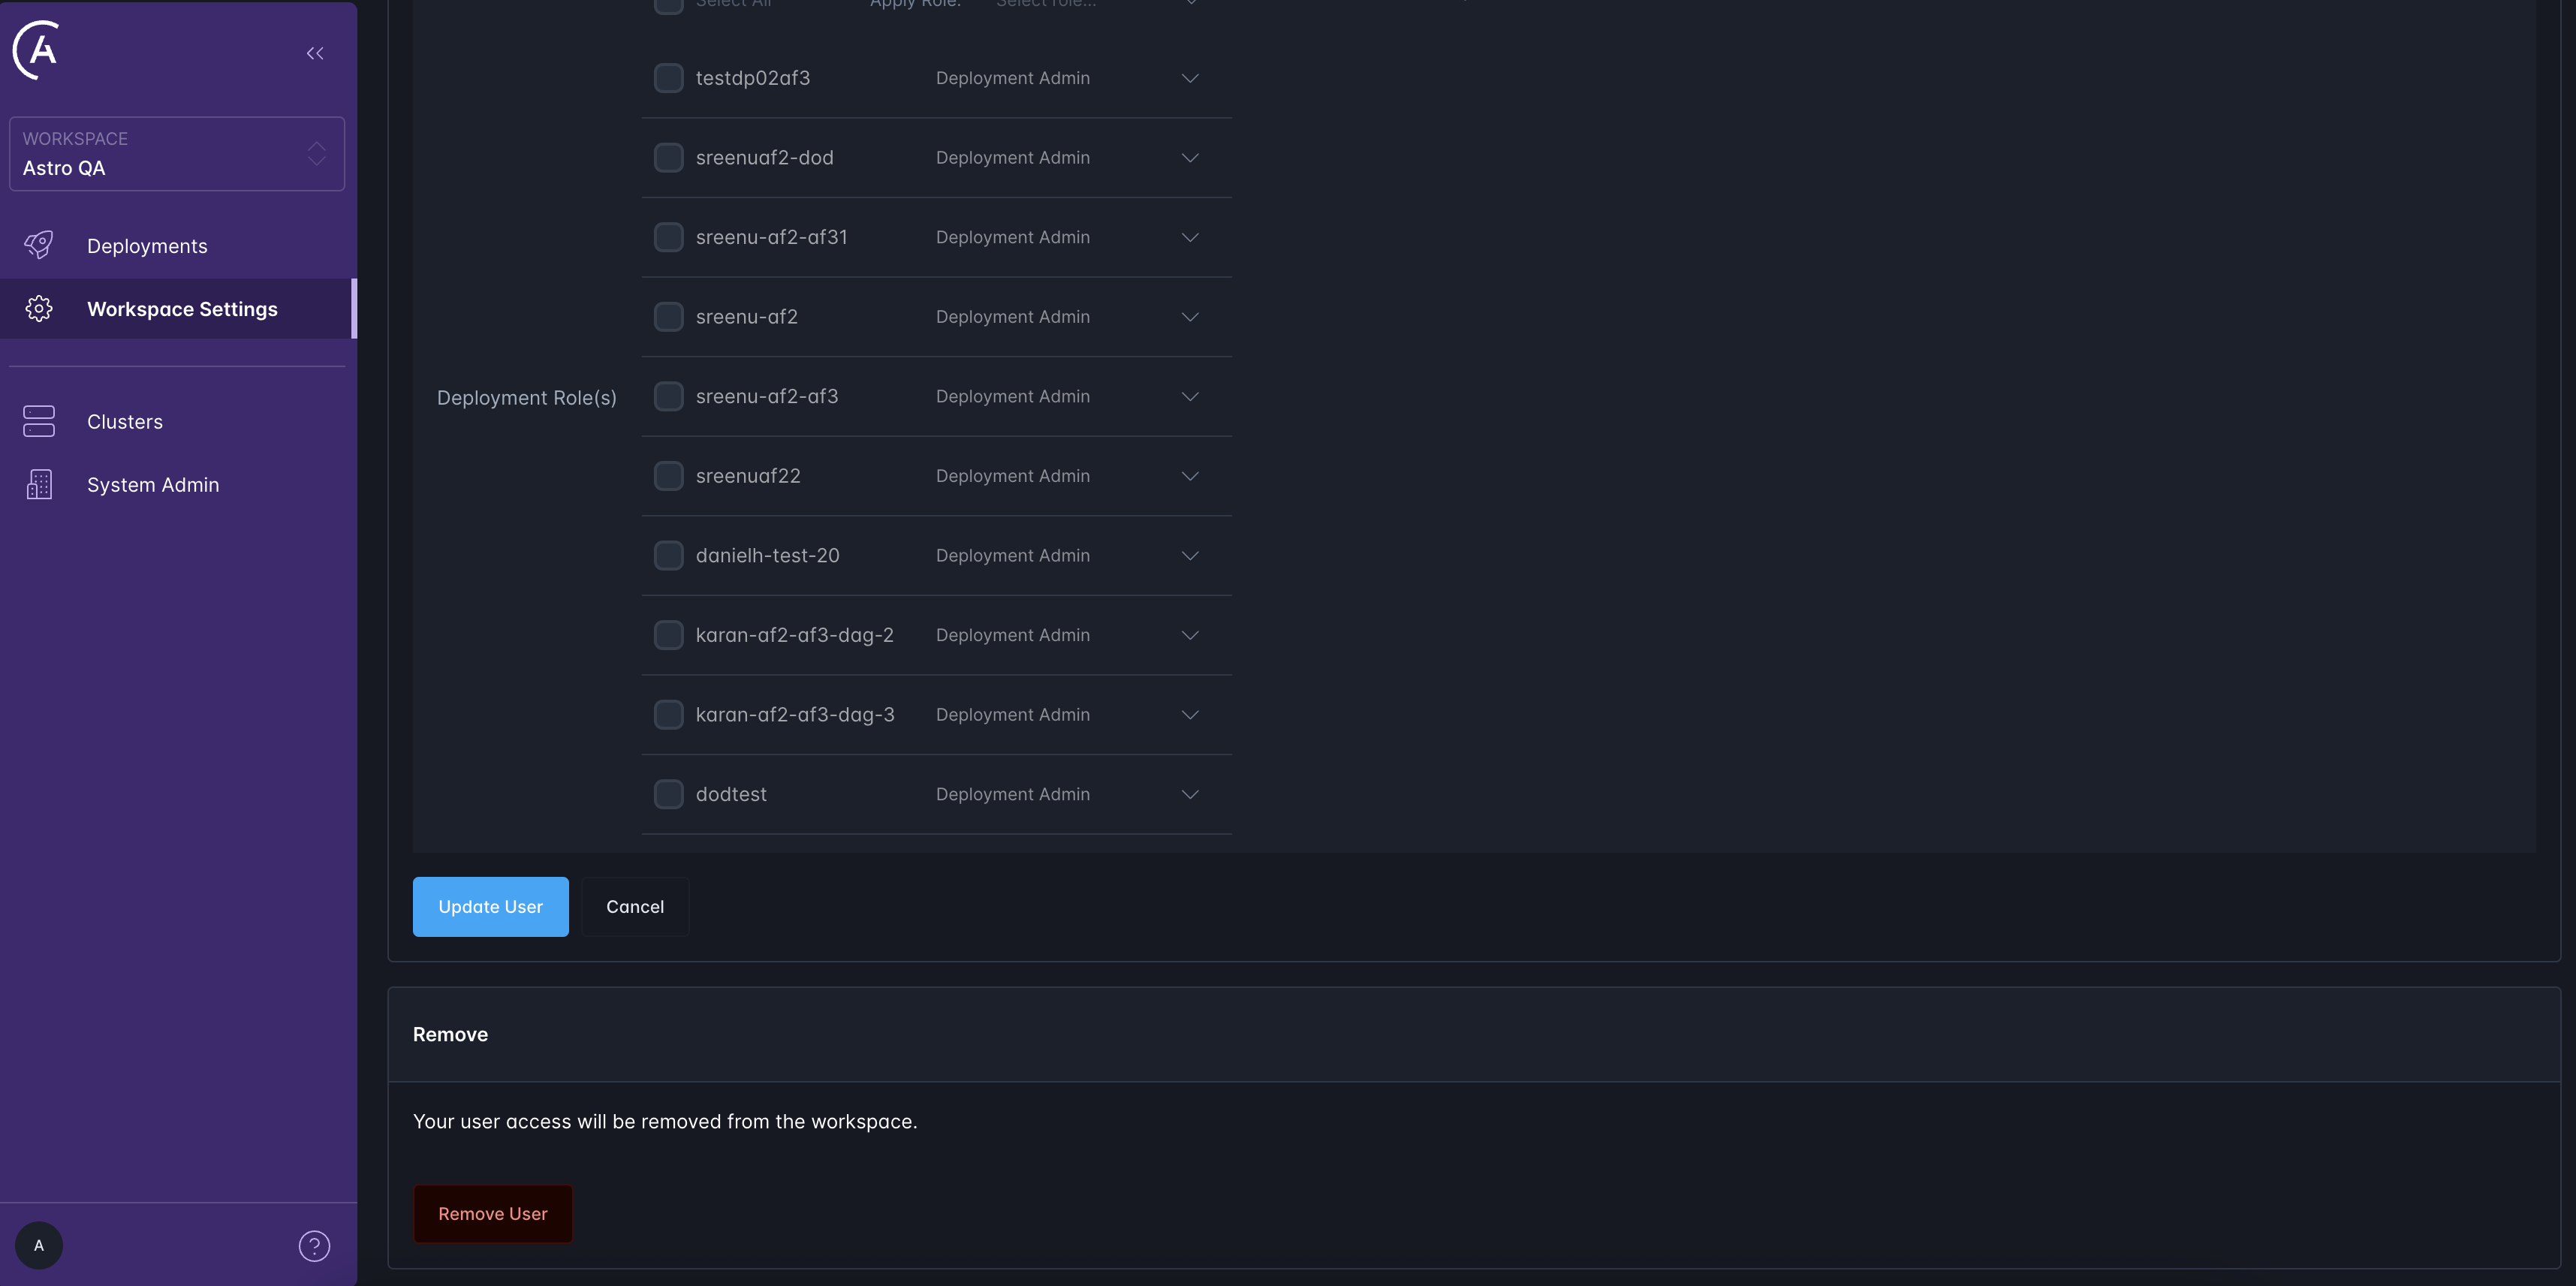
To remove a user from a Workspace via the Astro CLI, make sure you’re first operating in that Workspace. Then, run:
Only Workspace Admins can remove other Workspace users.
To list all users within a Deployment and their corresponding roles, select your Workspace from the left sidebar and navigate to Deployments > Individual Deployment > Users. All Deployment users have access to this view and can see the roles of other users.
To list Deployment users via the Astro CLI, run:
Deployment Admins can edit permissions using the dropdown menu in the Access tab in the Astro Private Cloud UI.
To edit a user’s role using the Astro CLI, run:
A Deployment-level role cannot be edited while a Workspace invitation to that user is pending. If you invite a user to a Workspace, you will not be able to modify their permissions until they accept the Workspace invite.
To delete a user from an Airflow Deployment via the Astro Private Cloud UI, Deployment Admins can click on the wastebasket icon within the Access tab shown in the screenshot above.
To delete a user from an Airflow Deployment using the Astro CLI, run:
Deployment Viewers are limited to read-only mode. They can only:
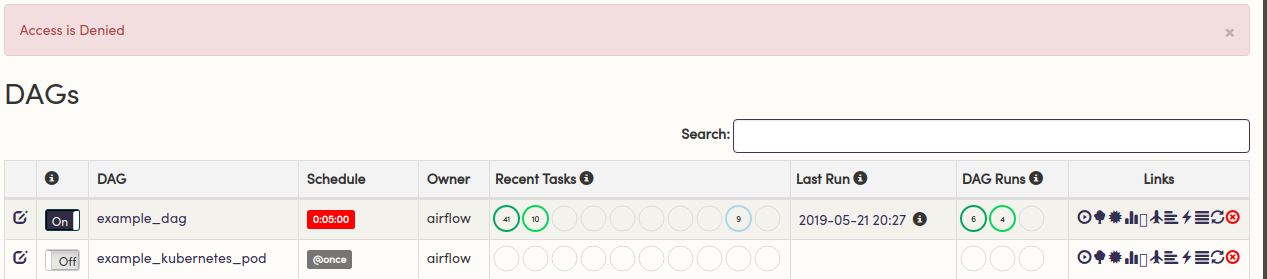
Deployment Viewers cannot deploy to, modify, or delete anything within an Airflow Deployment. Additionally, they cannot create or use service accounts to do so. Attempts to modify a Deployment in any way will result in a 403 and an Access is Denied message.
With fewer permissions than Admins, a Deployment Editor:
Deployment Admins are the highest-tiered role. Admins:
Every Deployment must have at least one Deployment Admin.
A Workspace Viewer is limited to read-only mode. Viewers:
If a role is not set, newly invited users are Workspace Viewers by default.
Below a Workspace Admin, an Editor:
Workspace Admins are the highest-tiered role at the Workspace level. Admins:
Every Workspace must have at least one Workspace Admin.
A Workspace Admin always has these permissions for any Deployment in the Workspace. Even if a Workspace Admin also has a defined role with lower permissions like Deployment Viewer, Astronomer uses the permissions configured for the user at the Workspace level.
System Viewers have read-only access across the entire platform. They:
System Editors have write access to most configurations but not full admin control. They:
System Admins have complete administrative access across the Astronomer platform. They:
As an Astro Private Cloud user, you can customize all user permissions at the platform-level. For more information, read: