

Astro alerts provide an additional level of observability to Airflow’s notification systems. You can configure an alert to notify you in Slack, PagerDuty, or through email when a Dag completes, if you have a Dag run failure, or if a task duration exceeds a specified time. You can also define whether alerts apply to a specific Deployment or across an entire Workspace or Organization.
Unlike Airflow callbacks and SLAs, Astro alerts don’t require changes to Dag code. Follow this guide to set up your Slack, PagerDuty, or email to receive alerts from Astro and then configure your Deployment to send alerts.
Each Astro alert has a notification channel and a trigger type. The notification channel determines the format and destination of an alert and the trigger type defines what triggers the alert.
You can trigger an alert to a notification channel using one of the following trigger types:
Deployment health alerts are customizable Astro Alerts that notify you about Deployment health incidents and suggest specific remediation actions. You can use these alerts to proactively monitor when Deployment health issues arise. For example, you can create an alert for when the Airflow metadata database storage is unusually high. All available Deployment health alerts are enabled by default for new Deployments and can be individually created, deleted, and edited in the Alerts tab of existing Deployments. If you don’t want Deployment health alerts for a new Deployment, disable Deployment Health Alerts in the Advanced section.
Astro enables the following Deployment health alerts by default for new Deployments. You can individually create and customize these alerts for any Deployment:
For new Deployments, Astro creates the default Deployment health alerts with Email as the notification channel Type. By default, these alerts notify the Contact Emails of the Deployment, specified in the Advanced section of the Deployment creation page.
If Contact Emails is empty, Astro displays the fallback email(s) that receives alert notifications for the Deployment in the Advanced section of Deployment configuration. To change this notification channel, ensure the Contact Emails field of your Deployment isn’t blank by editing Deployment Details.
Astro alerts requires OpenLineage. By default, every Astro Deployment using Hosted Execution has OpenLineage enabled. If you disabled OpenLineage in your Astro Deployment, you need to enable it to use Astro alerts. See Disable OpenLineage to find how to disable and re-enable OpenLineage.
If you use Remote Execution, you must enable OpenLineage for Remote Execution Agents to use Astro Alerts or Observe.
In the Astro UI, click Alerting > Alerts.
If you don’t have permissions to add a notification channel or alert at your Workspace or Organization-level, you can add one in the Alerts form through the Deployment settings page.
Click Add Alert.
Choose the Alert Type
Duration: Enter the Duration for how long a Dag or task should take to run before you send an alert to your notification channels.
Timeliness: Select the Days of Week that the alert should observe, the Verification Time when it should look for a Dag success, and the Lookback Period for how long it should look back for a verification time. For example, if an alert has a Verification Time of 3:00 PM UTC and a Lookback Period of 60 minutes, it will trigger whenever the given Dag doesn’t produce a successful Dag run from 2:00 to 3:00 PM UTC.
Alerts only evaluate runs that occur after the alert’s creation. If a Dag ran successfully within the Look Back Period of a timeliness alert, the alert will still trigger on initial evaluation, since that run occurred before the alert was created.
The following alert types must be defined at the Deployment level:
For Dag and Task Alerts, you can further customize the circumstances in which the alert is triggered by defining:
Attribute
Operator
Values/Substring
The following example is a task-level alert for all tasks with a Task ID that contains the substring prod in all Dags within a Deployment:

Select the Notification Channels for the Alert. You can also create a new notification channel by clicking +Notification Channel. See Notification Channels for information on configuring and adding Notification Channels.
After you select a Dag that you want to apply an alert to, Astro automatically generates a name for your alert. However, you can choose to change the name of your alert.
Expand the Change alert names… section.
Edit the Alert Name.
Click Create Alert to save your changes.
Astro alerts work whether your Dag run is manual or scheduled, so you can test your configured Astro alerts by failing your Dag manually.
In the Astro UI, click Dags.
Choose the Dag that has your alert configured.
Trigger a Dag run.
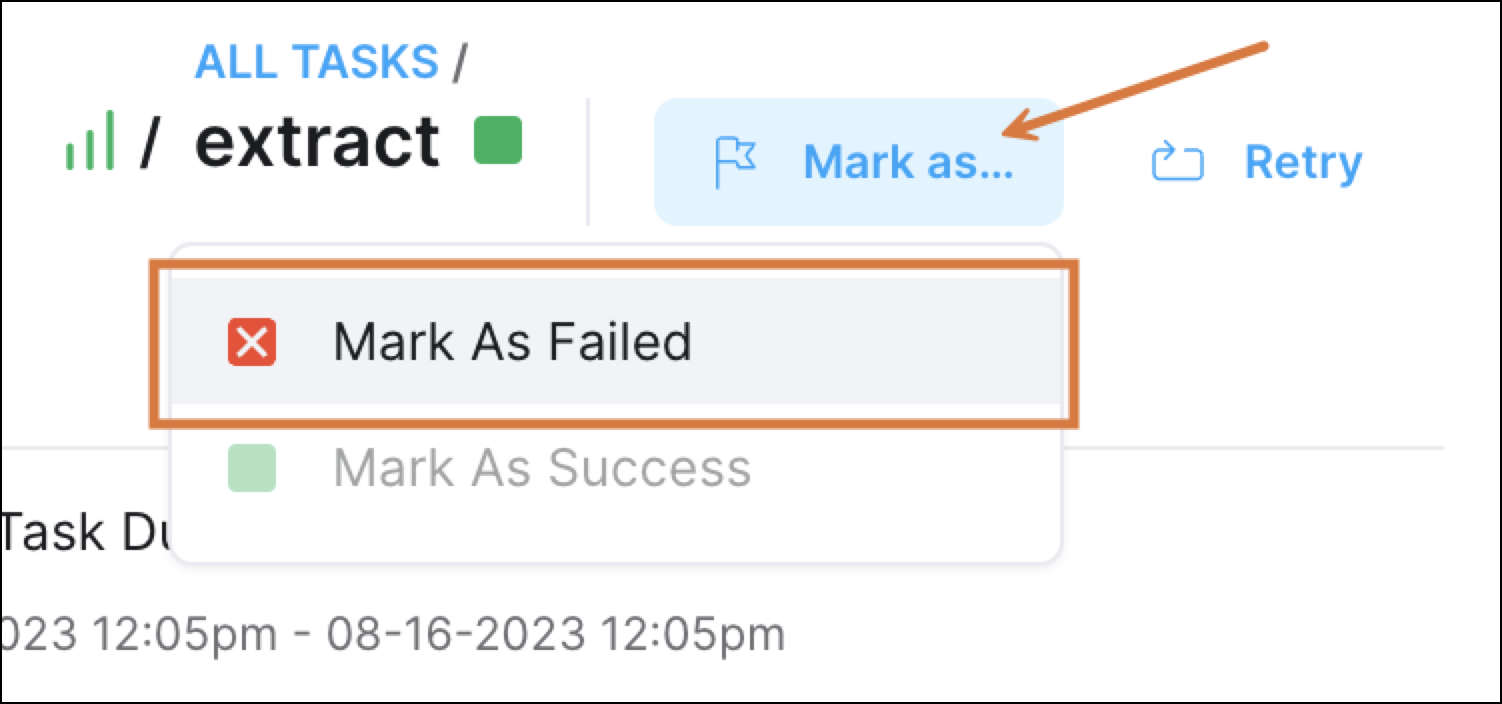
Select Mark as and choose Failed to trigger an alert for a Dag failure.
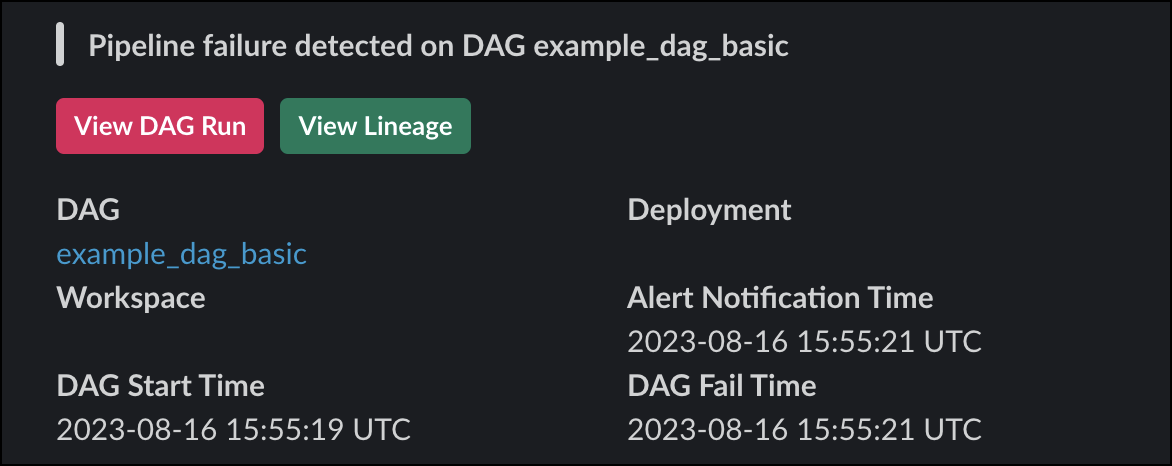
Check your Slack, PagerDuty, or Email alerts for your Dag failure alert. The alert includes information about the Dag, Workspace, Deployment, and data lineage associated with the failure as well as direct links to the Astro UI.
You can send Astro alerts, including Deployment Health Alerts, to the following notification channels
When you create a notification channel, you can define whether it is available to a specific Deployment or available to an entire Workspace or Organization. The type of scope you can use for your notification channels depends on your user permissions.
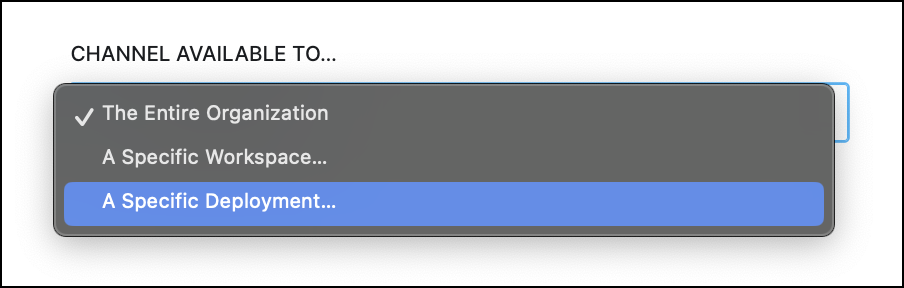
You can view, create, and manage notification channels for your Workspace or Organization in the Notification channels page or when creating a Deployment alert.
To set up alerts in Slack, you need to create a Slack app in your Slack workspace. After you’ve created your app, you can generate a webhook URL in Slack where Astro will send alerts.
Go to Slack API: Applications to create a new app in your organization’s Slack workspace.
Click From scratch when prompted to choose how you want to create your app.
Enter a name for your app, like astro-alerts, choose the Slack workspace where you want Astro to send your alerts, and then click Create App.
Select Incoming webhooks.
On the Incoming webhooks page, click the toggle to turn on Activate Incoming Webhooks. See Sending messages using Incoming Webhooks.
In the Webhook URLs for your Workspace section, click Add new Webhook to Workspace.
Choose the channel where you want to send your Astro alerts and click Allow.
After your webhook is created, copy the webhook URL from the new entry in the Webhook URLs for your Workspace table.
You can add notification channels in the Astro UI.
In the Astro UI, click Alerting > Notification channels.
Click Add Notification Channel.
Enter a name for your notification channel.
Choose the Channel Type.
Add the notification channel information.
Paste the Webhook URL from your Slack workspace app. If you need to find a URL for an app you’ve already created, go to your Slack Apps page, select your app, and then choose the Incoming Webhooks page.
Choose the scope by defining what you want to make Notification channel available to:
Click Create notification channel.
To view a historical log of all previously triggered Alerts for your Organization, click Notification History under the Alerting section of the navigation. You can filter the notification log based on:
To view the notification history for a particular Alert, click Alerts in the Alerting section of the navigation. Here, you can see the number of times an Alert sent a notification (in the “Sent” column) or failed to send a notification (in the “Failed” column). Click the number in the Sent column to see notification history for that Alert.