

Connections in Airflow are sets of configurations used to connect with other tools in the data ecosystem. Because most hooks and operators rely on connections to send and retrieve data from external systems, understanding how to create and configure them is essential for running Airflow in a production environment.
In this guide you’ll:
There are multiple resources for learning about this topic. See also:
For Astro customers, Astronomer recommends using the Astro Environment Manager to store connections in an Astro-managed secrets backend. These connections can be shared across multiple deployed and local Airflow environments. See Create Airflow connections in the Astro UI.
To get the most out of this guide, you should have an understanding of:
An Airflow connection is a set of configurations that send requests to the API of an external tool. In most cases, a connection requires login credentials or a private key to authenticate Airflow to the external tool.
Airflow connections can be created by using one of the following methods:
airflow_settings.yaml file for Astro CLI users.This guide focuses on adding connections using the Airflow UI and environment variables. For more in-depth information on configuring connections using other methods, see the REST API reference, Managing Connections and Secrets Backend.
Each connection has a unique conn_id which can be provided to operators and hooks that require a connection.
To standardize connections, Airflow includes many different connection types. There are general connection types for connecting to large clouds, such as aws_default and gcp_default, as well as connection types for specific services like azure_service_bus_default.
Each connection type requires different configurations and values based on the service it’s connecting to. There are a couple of ways to find the information you need to provide for a particular connection type:
If you use a mix of strategies for managing connections, it’s important to understand that if the same connection is defined in multiple ways, Airflow uses the following order of precedence:
See How Airflow finds connections for more information.
The most common way of defining a connection is using the Airflow UI. Go to Admin > Connections.
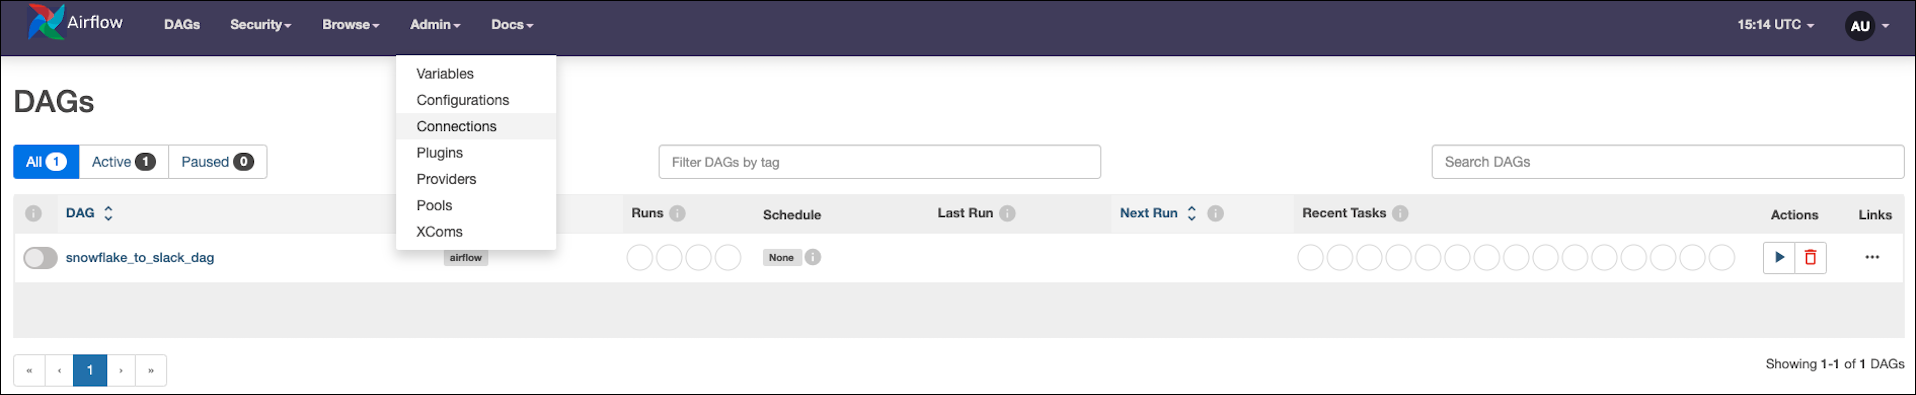
Airflow doesn’t provide any preconfigured connections. To create a new connection, click the blue + button.
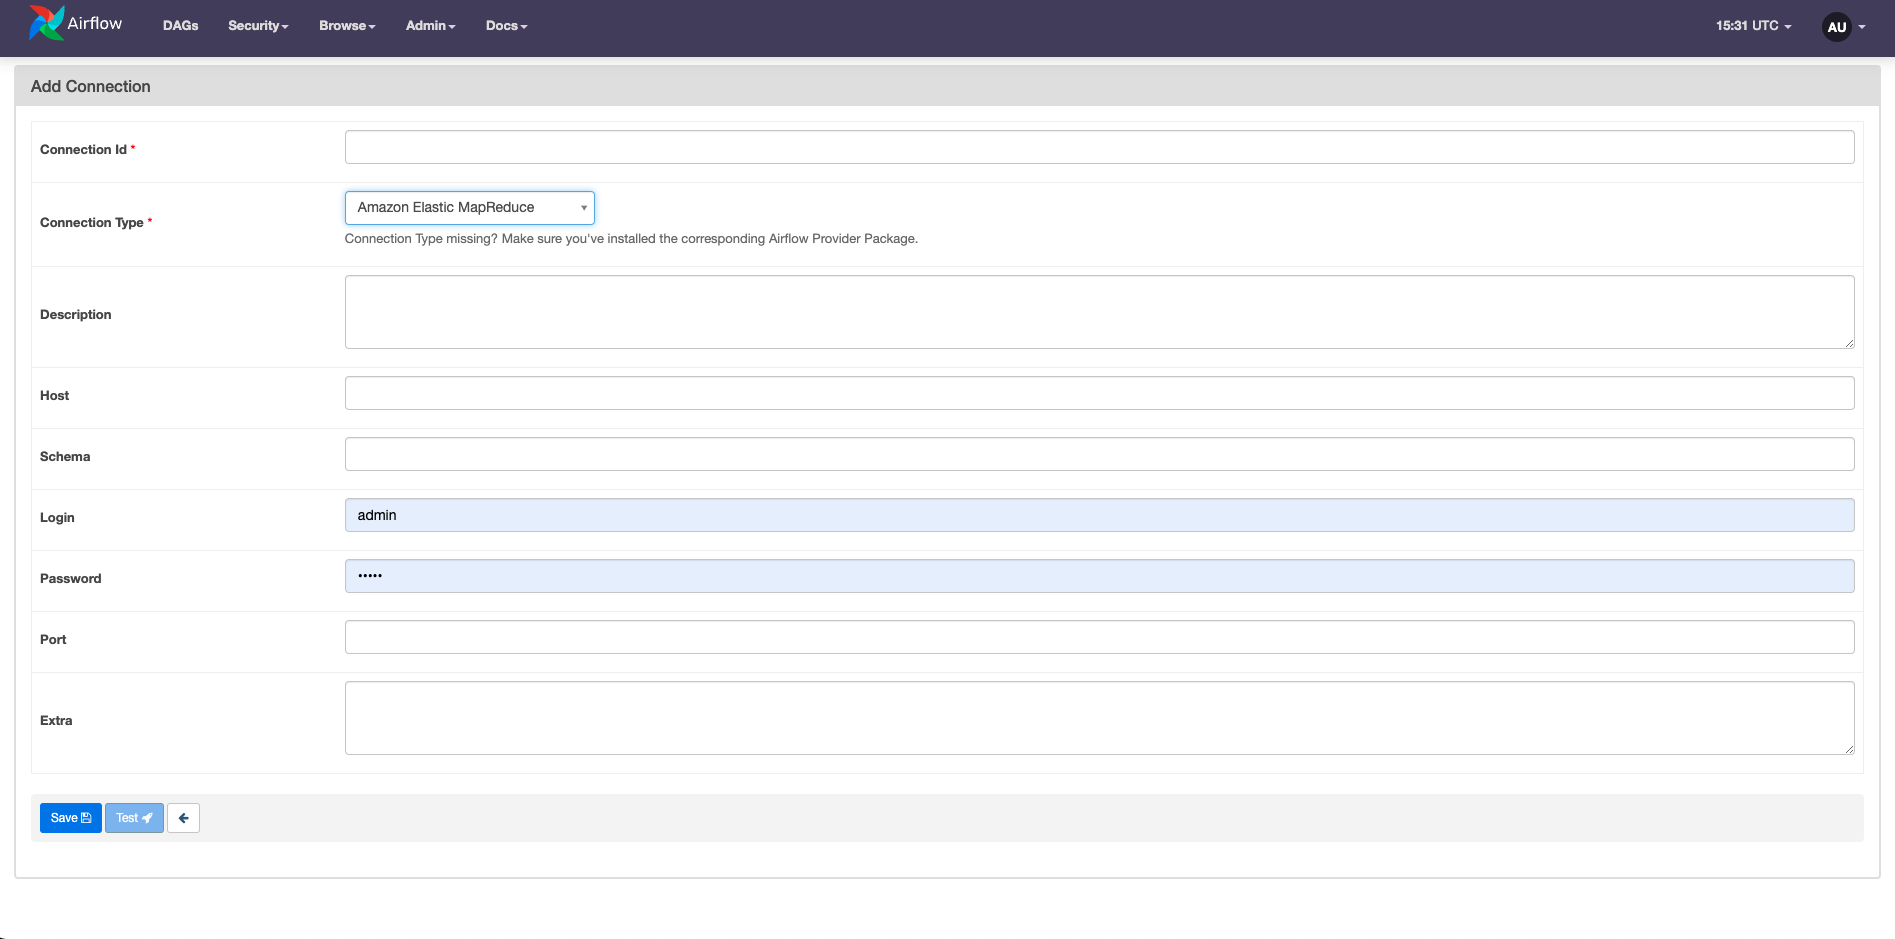
As you update the Connection Type field, notice how the other available fields change. Each connection type requires different kinds of information. Specific connection types are only available in the dropdown list when the relevant provider is installed in your Airflow environment.
You don’t have to specify every field for most connections. However, the values marked as required in the Airflow UI can be misleading. For example, to set up a connection to a PostgreSQL database, you need to reference the PostgreSQL provider documentation to learn that the connection requires a Host, a user name as login, and a password in the password field.
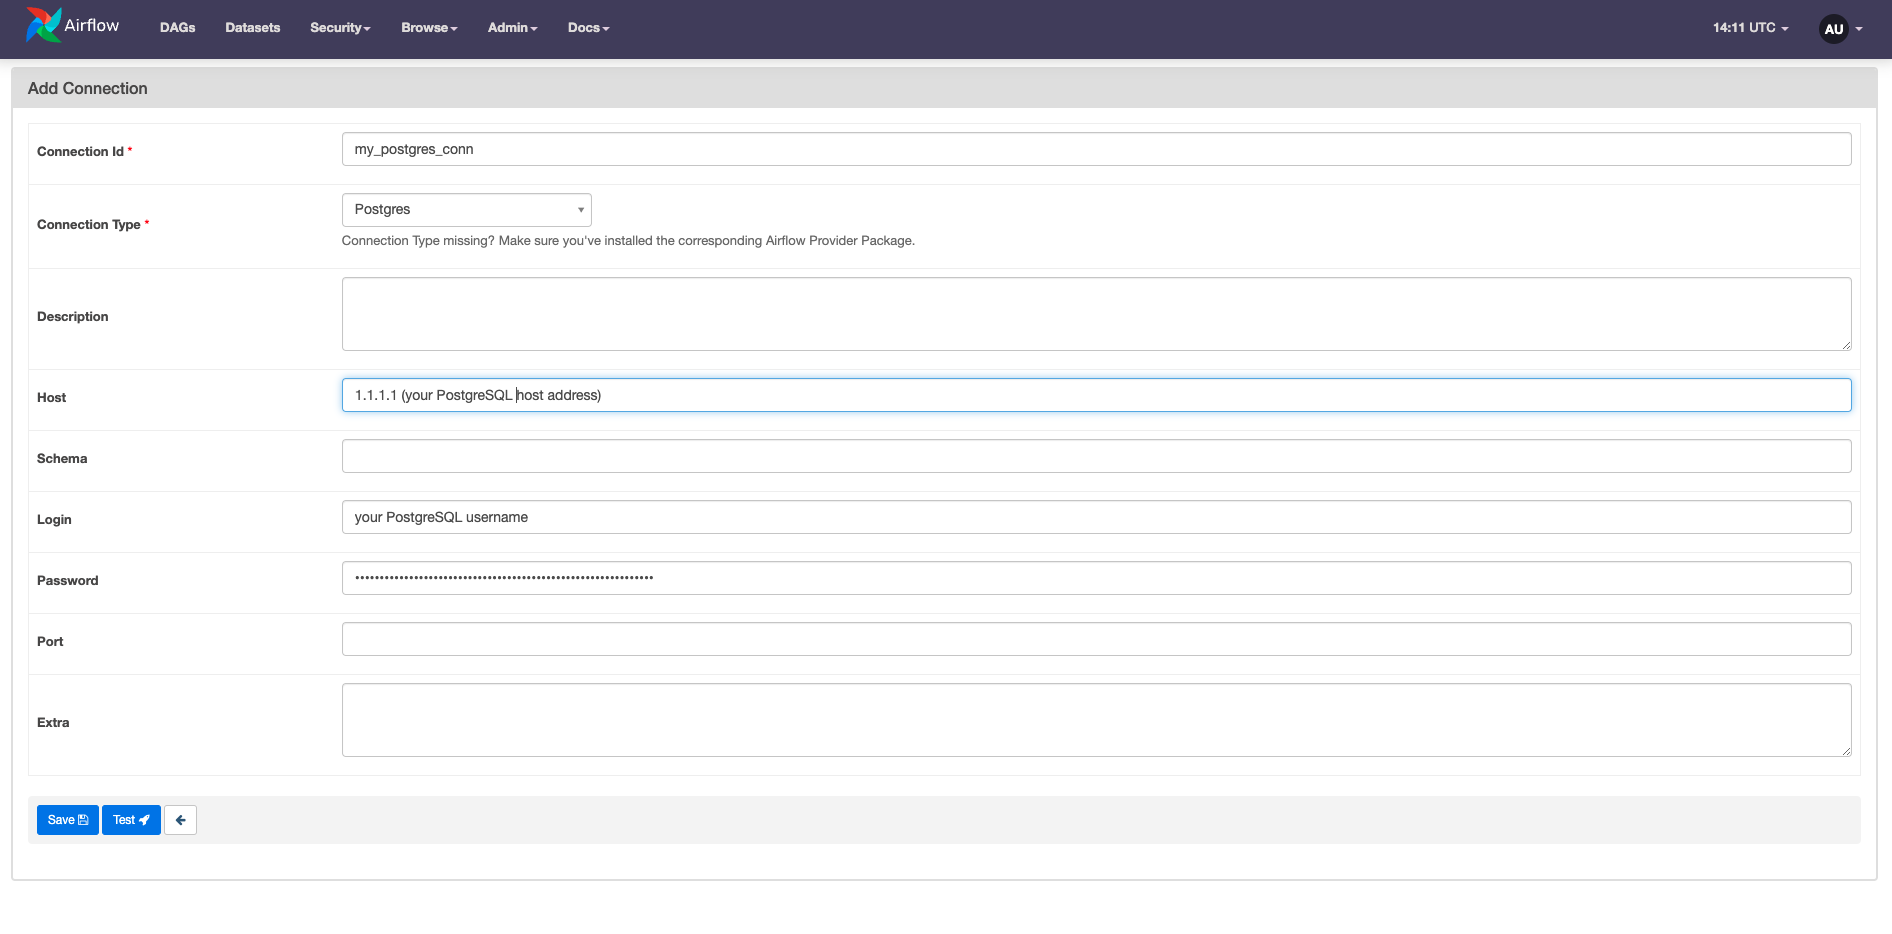
Any parameters that don’t have specific fields in the connection form can be defined in the Extra field as a JSON dictionary. For example, you can add the sslmode or a client sslkey in the Extra field of your PostgreSQL connection.
You can test some connection types from the Airflow UI with the Test button if you enable test_connection in the Airflow config. After running a connection test, a message shows either a success confirmation or an error message. When using the Test button, the connection to your external tool is made from the webserver component of Airflow. See also Testing connections in the Airflow documentation.
Connections can also be defined using environment variables. If you use the Astro CLI, you can use the .env file for local development or specify environment variables in your project’s Dockerfile.
Note: If you are synchronizing your project to a remote repository, don’t save sensitive information in your Dockerfile. In this case, using either a secrets backend, Airflow connections defined in the UI, or
.envlocally are preferred to avoid exposing secrets in plain text.
The environment variable used for the connection must be formatted as AIRFLOW_CONN_YOURCONNID and can be provided as a Uniform Resource Identifier (URI) or in JSON.
URI is a format designed to contain all necessary connection information in one string, starting with the connection type, followed by login, password, and host. In many cases a specific port, schema, and additional parameters must be added.
Connections can also be provided to an environment variable as a JSON dictionary:
Connections that are defined using environment variables do not appear in the list of available connections in the Airflow UI.
To store a connection in JSON as an Astro environment variable, remove all line breaks in your JSON object so that the value is a single, unbroken line. See Add Airflow connections and variables using environment variables
Connections often contain sensitive credentials. By default, Airflow hides the password field in the UI and in the Airflow logs. If AIRFLOW__CORE__HIDE_SENSITIVE_VAR_CONN_FIELDS is set to True, values from the connection’s Extra field are also hidden if their keys contain any of the words listed in AIRFLOW__CORE__SENSITIVE_VAR_CONN_NAMES. You can find more information on masking, including a list of the default values in this environment variable, in the Airflow documentation on Masking sensitive data.
Airflow offers several ways to test your connections by calling the test_connection method of the Airflow hook associated with your connection. Provider hooks that do not have this method defined cannot be tested using these methods.
connections/test endpoint to test connections. This is the same endpoint that the Airflow UI uses to test connections.airflow connections test <conn_id>, if you have test_connection enabled in the Airflow config. If you use the Astro CLI, you can access this command by running astro dev run connections test <conn_id>.In Airflow 2.7+ testing connections by any of the methods above is disabled by default. You can enable connection testing by setting the test_connection core config to Enabled by defining the environment variable AIRFLOW__CORE__TEST_CONNECTION=Enabled in your Airflow environment. Astronomer recommends not to enable this feature until you made sure that only highly trusted UI/API users have “edit connection” permissions.
In this example, you’ll configure the SnowflakeToSlackOperator, which requires connections to Snowflake and Slack. You’ll define the connections using the Airflow UI.
Before starting Airflow, you need to install the Snowflake and the Slack providers. If you use the Astro CLI, you can install the packages by adding the following lines to your Astro project’s requirements.txt file:
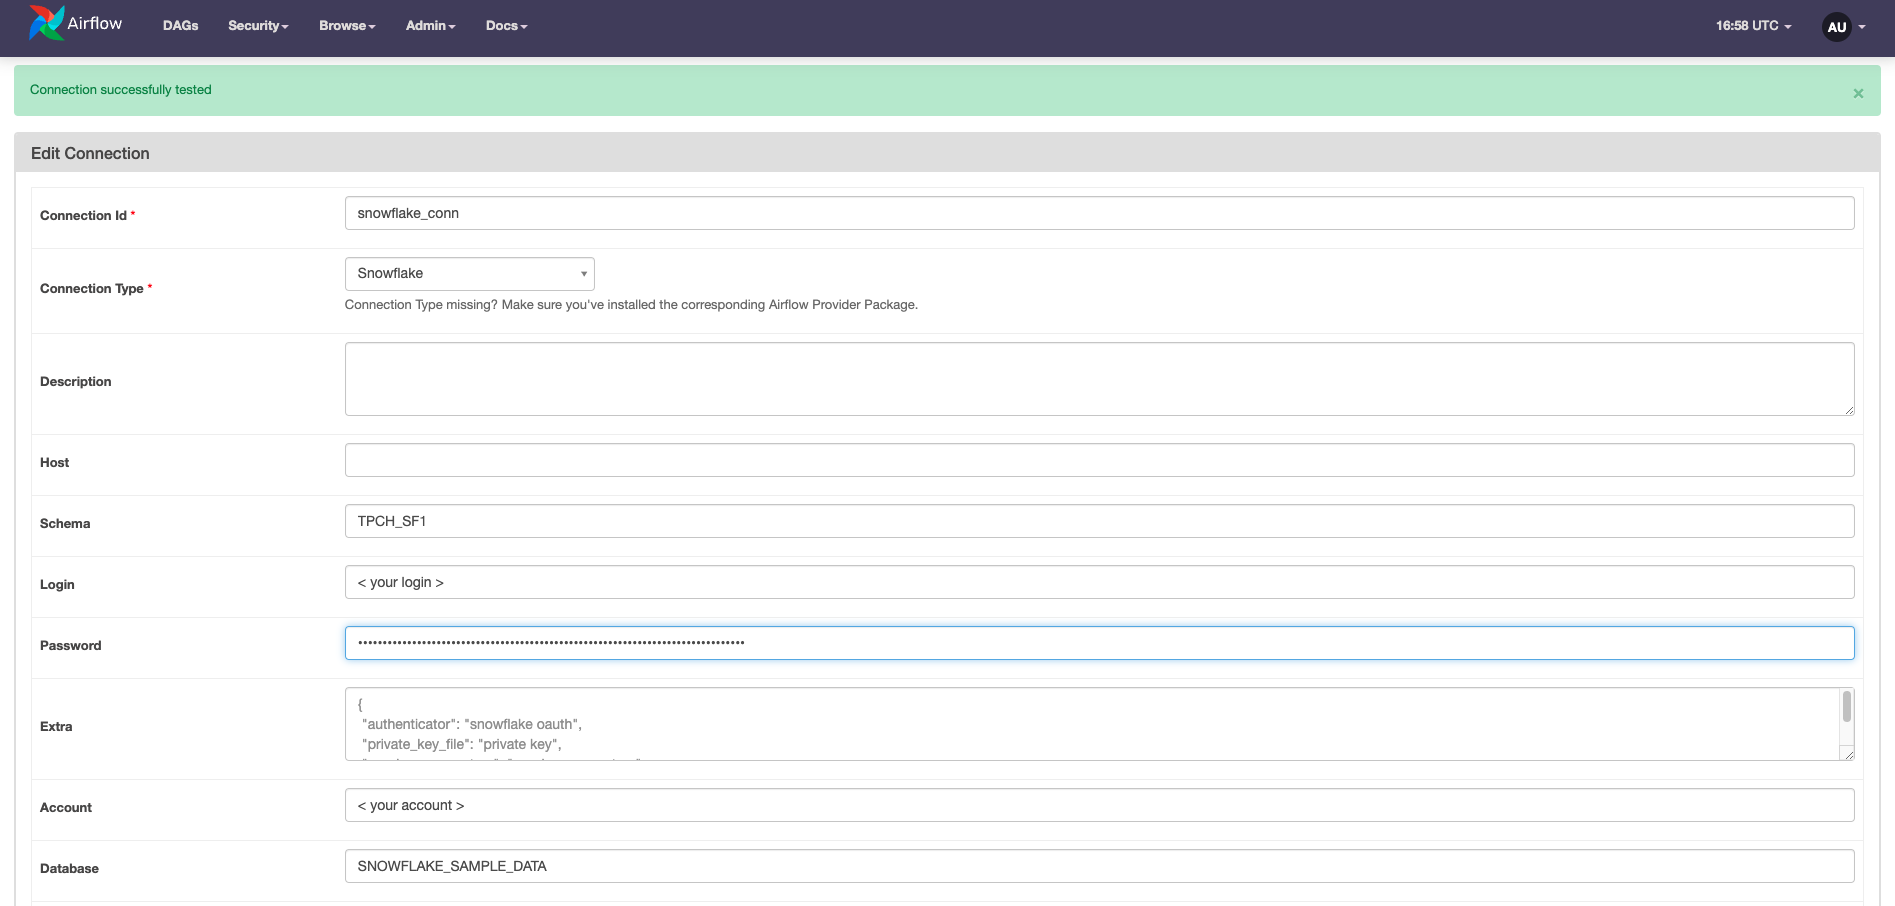
Open the Airflow UI and create a new connection. Set the Connection Type to Snowflake. This connection type requires the following parameters:
snowflake_conn or any other string that is not already in use by an existing connectionSnowflakexy12345.regionYou can leave the other fields empty. Click Test to test the connection.
The following image shows the connection to Snowflake was successful.
Next you’ll set up a connection to Slack. To post a message to a Slack channel, you need to create a Slack app for your server and configure incoming webhooks. See the Slack Documentation for setup steps.
To connect to Slack from Airflow, you need to provide the following parameters:
slack_conn (or another string that has not been used for a different connection already)Slack Webhookhttps://hooks.slack.com.services, which is the first part of your Webhook URLT00000000/B00000000/XXXXXXXXXXXXXXXXXXXXXXXXClick Test to test the connection.
The last step is writing the DAG using the SnowflakeToSlackOperator to run a SQL query on a Snowflake table and post the result as a message to a Slack channel. The SnowflakeToSlackOperator requires both the connection id for the Snowflake connection (snowflake_conn_id) and the connection id for the Slack connection (slack_conn_id).